Cedar Policy Language Support
This page describes how the application supports the Cedar policy language for defining and managing authorization rules.
What is Cedar?
Section titled “What is Cedar?”Cedar is a policy language developed by AWS designed for fine-grained access control. It provides a declarative way to express authorization rules using principals (who), actions (what), and resources (on what).
The application uses Cedar as its underlying policy language, allowing you to:
- Define authorization rules using familiar concepts (subjects, actions, resources)
- Write conditions using Cedar expression syntax
- Export policies in Cedar format for use with compatible engines (e.g., Amazon Verified Permissions)
- Visualize your authorization schema as a Cedar schema diagram
Core Concepts
Section titled “Core Concepts”Mapping to Cedar
Section titled “Mapping to Cedar”| Application Concept | Cedar Concept | Description |
|---|---|---|
| Entity (User, Admin, etc.) | Principal Type | Who can perform actions |
| Entity (Document, Order, etc.) | Resource Type | What can be accessed |
| Entity Properties | Attributes | Data used in conditions |
| Actions (read, write, delete) | Actions | Operations that can be performed |
| Rules | Policies | Authorization decisions |
Rule Structure
Section titled “Rule Structure”Every rule in the application maps to a Cedar policy with the following structure:
permit|forbid ( principal is PrincipalType, action in [Action::"actionCode"], resource is ResourceType)when { // conditions that must be true}unless { // exceptions that block the rule};Writing Cedar Expressions
Section titled “Writing Cedar Expressions”Expression Builder
Section titled “Expression Builder”The application provides an intelligent expression builder for writing when and unless conditions. The builder offers:
- Autocomplete suggestions based on your schema
- Syntax validation in real-time
- Color-coded highlighting for better readability
Available References
Section titled “Available References”When writing expressions, you can reference:
| Reference | Description | Example |
|---|---|---|
subject | The principal requesting access | subject.department |
resource | The resource being accessed | resource.owner |
context | Runtime context information | context.ip |
action | The action being performed | action |
Operators
Section titled “Operators”Comparison Operators:
==- Equal to!=- Not equal to<,>,<=,>=- Numeric comparisonsin- Membership in a setlike- Pattern matching (wildcards)has- Check if attribute exists
Logical Operators:
&&- Logical AND||- Logical OR!- Logical NOT
Arithmetic Operators:
+- Addition-- Subtraction*- Multiplication
Note: Cedar does not support division by design, to ensure policies remain analyzable and avoid division-by-zero issues.
Built-in Functions
Section titled “Built-in Functions”Set Operations:
contains(element)- Check if set contains elementcontainsAll([elements])- Check if set contains all elementscontainsAny([elements])- Check if set contains any element
Date/Time Functions:
duration("2h")- Create a duration valuedurationSince(datetime)- Time elapsed since a datetoDate(value)- Convert to datetoTime(value)- Convert to timetoDateTime(value)- Convert to datetime
Expression Examples
Section titled “Expression Examples”Simple attribute comparison:
subject.department == "Finance"Multiple conditions:
subject.role == "manager" && resource.status == "pending"Set membership:
subject.clearanceLevel in ["secret", "top-secret"]Set contains check:
subject.roles.contains("admin")Pattern matching:
resource.name like "report-*"Time-based condition:
context.requestTime.durationSince(resource.createdAt) < duration("24h")Complex expression:
subject.role == "risk manager" && resource.amount > context.dailyLimit && context.newOverrideAmount <= context.standardLimit * 2Cedar Schema
Section titled “Cedar Schema”Viewing the Schema
Section titled “Viewing the Schema”Access the Cedar schema from the Entities page:
- Navigate to Schema > Entities
- Click the Cedar Schema button
- The schema displays in JSON format
The schema viewer allows you to:
- View the complete Cedar schema definition
- Copy the schema to clipboard
- Download as a JSON file
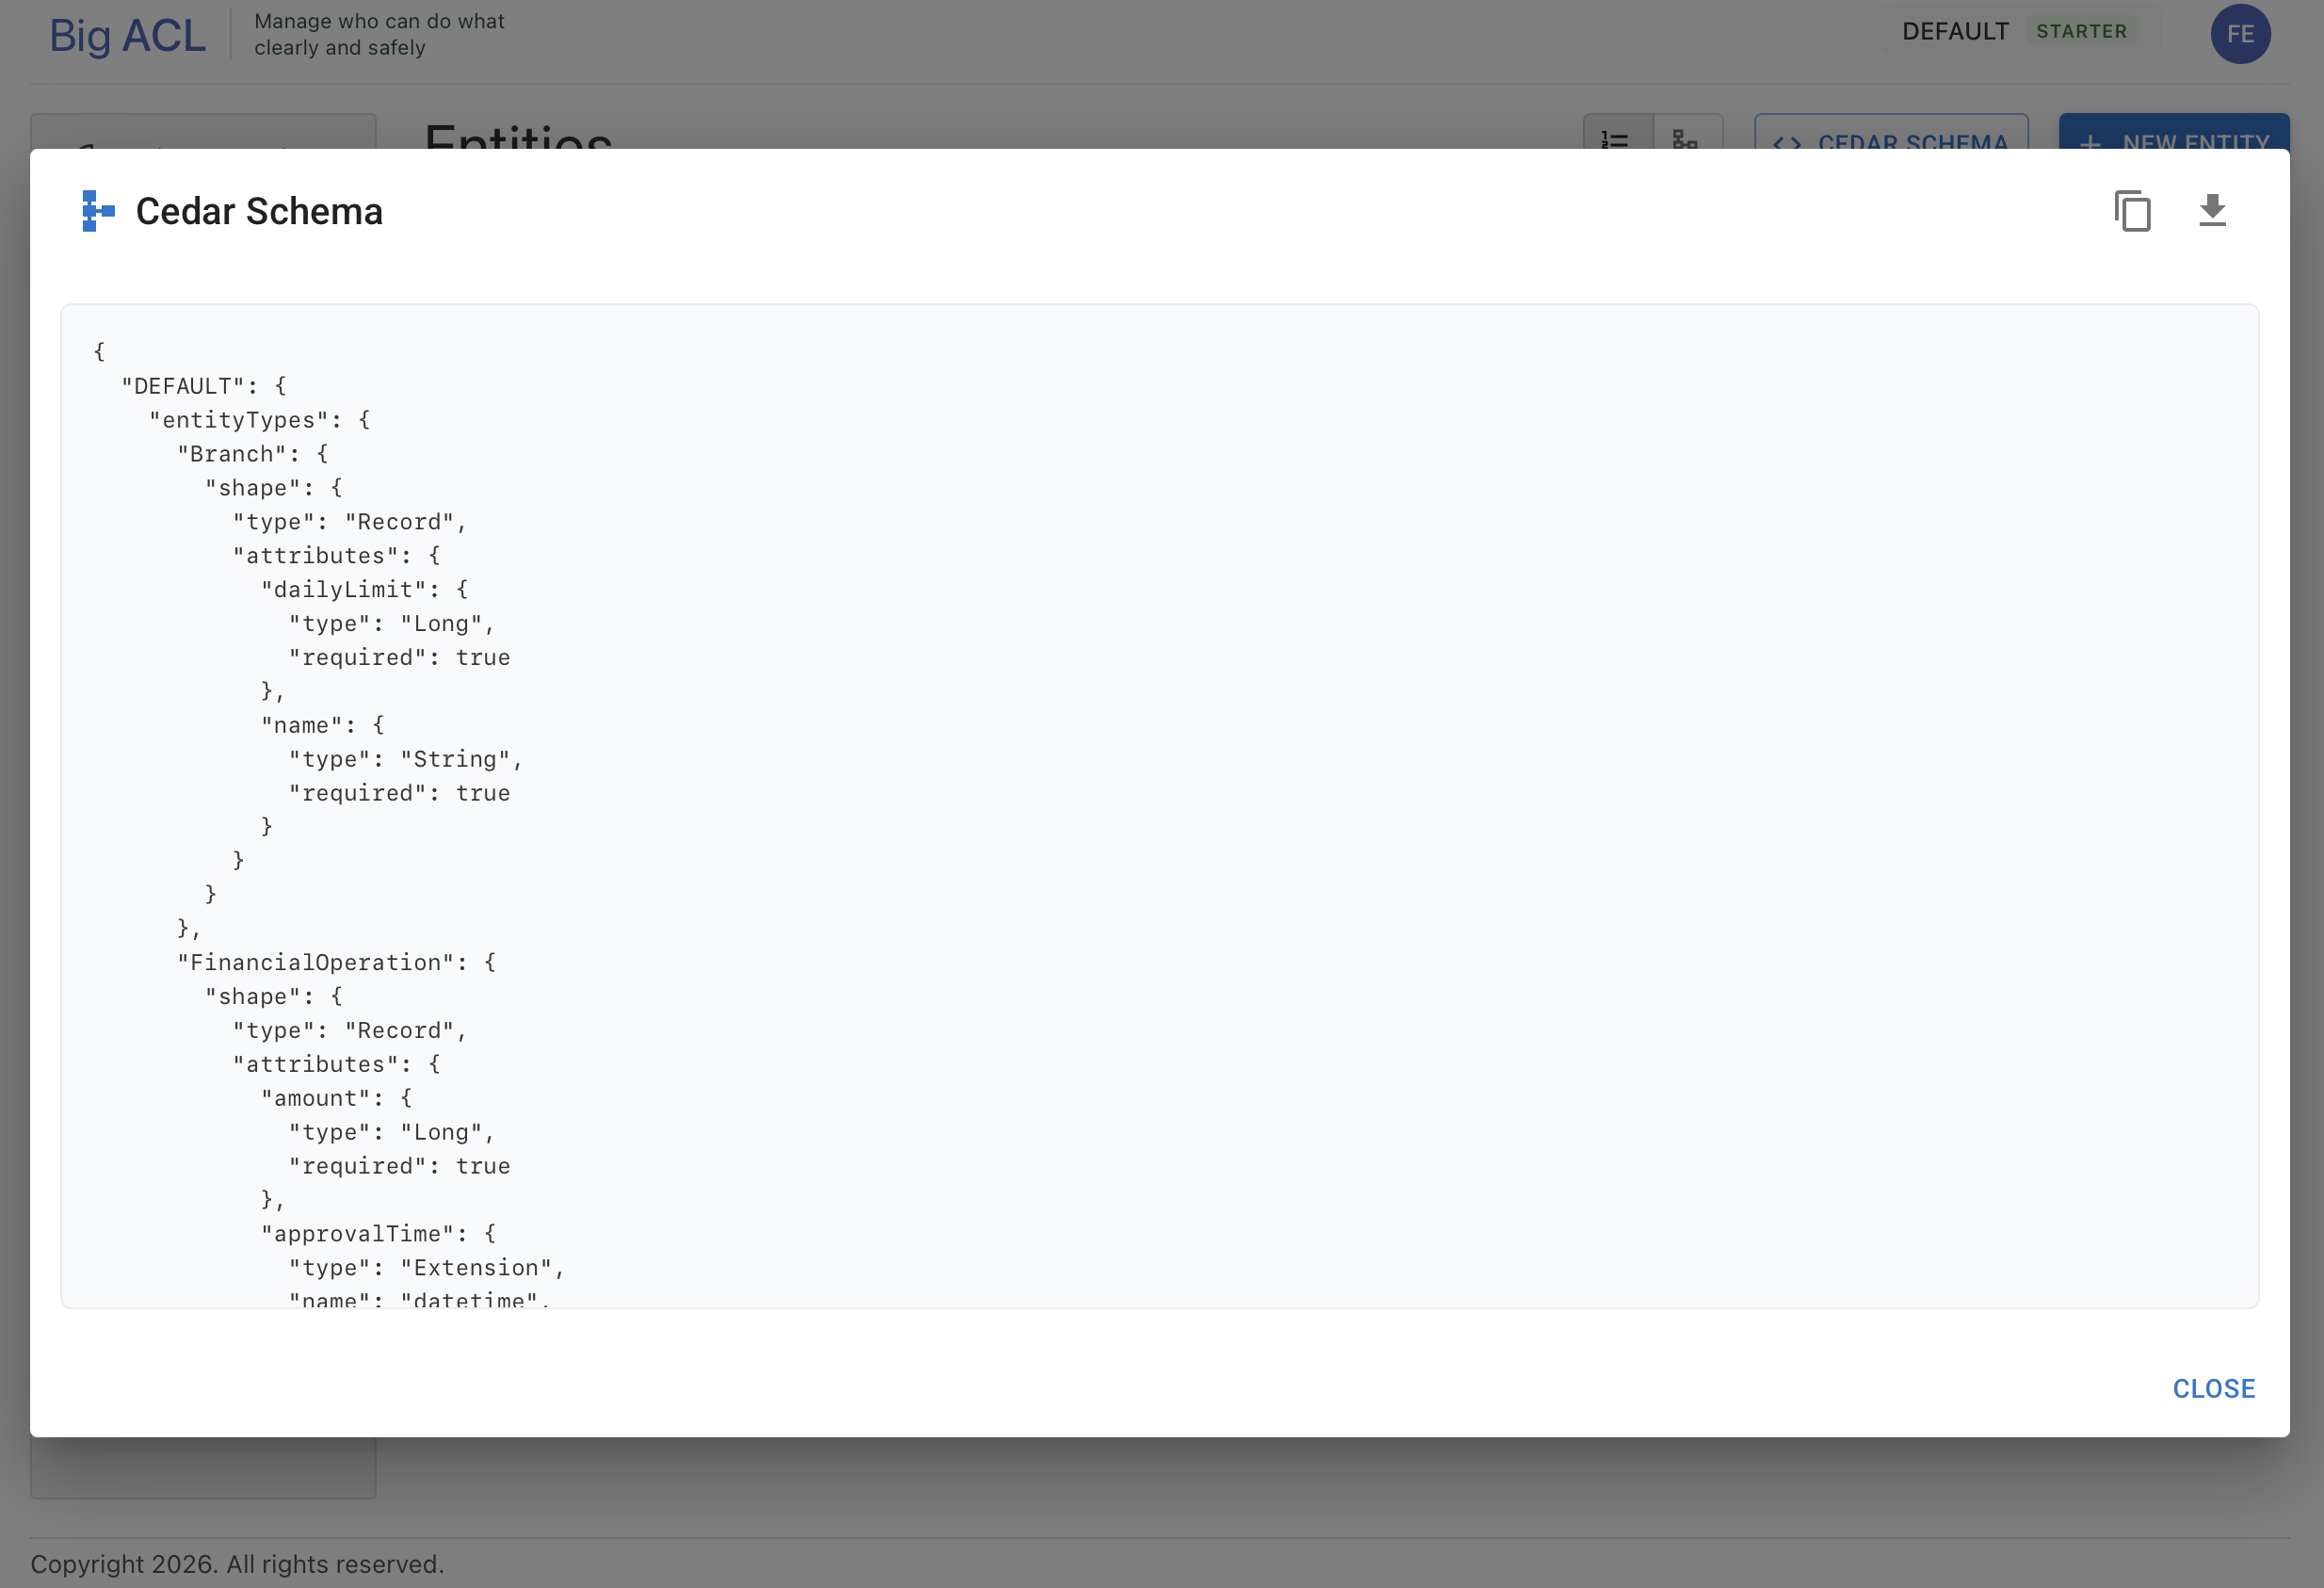
Schema Structure
Section titled “Schema Structure”The Cedar schema defines:
{ "Namespace": { "entityTypes": { "User": { "shape": { "type": "Record", "attributes": { "email": { "type": "String" }, "department": { "type": "String" }, "roles": { "type": "Set", "element": { "type": "String" } } } } } }, "actions": { "read": { "appliesTo": { "principalTypes": ["User"], "resourceTypes": ["Document"] } } } }}Schema Diagram
Section titled “Schema Diagram”The Cedar Schema Diagram provides a visual representation of your authorization model:
- Navigate to Schema > Entities
- Click the Cedar Schema button
- Select the Diagram tab
The diagram shows:
- Principal entities (blue) - Who can perform actions
- Resource entities (orange) - What can be accessed
- Relationships - Arrows showing which actions connect principals to resources
- Attributes - Entity properties with their types
Cedar Policy Export
Section titled “Cedar Policy Export”Viewing Translations in the Verify Panel
Section titled “Viewing Translations in the Verify Panel”Cedar translations for all rules in a policy are available from the Verify Panel > Translations tab on the policy detail screen. The translation is tracked with a status:
| Status | Description |
|---|---|
NONE | No translation has been generated yet |
TRANSLATING | Translation is being generated |
READY | Translation is up to date and available |
STALE | Rules have changed since the last translation |
ERROR | An error occurred during translation |
When the status is STALE, click Regenerate to force a re-translation.
Three formats are available in the Translations tab:
- Rego — for Open Policy Agent
- Cedar Schema — the schema definition
- Cedar Policies — the translated policy rules
All formats support syntax highlighting and copy to clipboard.
Viewing a Rule as Cedar Policy
Section titled “Viewing a Rule as Cedar Policy”Each rule can also be viewed individually as a Cedar policy:
- Open a rule from the policy’s rules list
- Click the Cedar button in the toolbar
- The policy displays in Cedar syntax
Policy Format
Section titled “Policy Format”The exported policy follows the Cedar specification:
permit( principal is User, action in [Action::"approve"], resource is PurchaseOrder)when { subject.department == resource.department && resource.amount <= subject.approvalLimit}unless { resource.status == "closed"};Using with Amazon Verified Permissions
Section titled “Using with Amazon Verified Permissions”The generated Cedar policies are compatible with Amazon Verified Permissions (AVP). To use your policies:
- Export your Cedar schema
- Export your rules as Cedar policies
- Import both into your AVP policy store
- Configure the AVP connector in your application
Expression Builder Features
Section titled “Expression Builder Features”Autocomplete
Section titled “Autocomplete”The expression builder provides intelligent autocomplete:
- After typing
subject.- Shows available subject attributes - After typing
resource.- Shows available resource attributes - After typing
context.- Shows context attributes (ip, time, location, device, authenticated) - After comparison operators - Suggests values and references
- After
in- Suggests set syntax[...] - After boolean expressions - Suggests logical operators (
&&,||)
Navigation
Section titled “Navigation”- Up/Down arrows - Navigate suggestions
- Enter or Tab - Select suggestion
- Escape - Close suggestions
- Type to filter - Suggestions filter as you type
Validation
Section titled “Validation”Expressions are validated in real-time:
- Syntax errors appear below the input field
- Valid expressions show a success indicator
- Server-side validation confirms the expression can be parsed
Best Practices
Section titled “Best Practices”Writing Effective Conditions
Section titled “Writing Effective Conditions”- Keep conditions simple - Break complex rules into multiple simpler rules
- Use meaningful attribute names - Makes policies self-documenting
- Prefer explicit comparisons - Use
== trueinstead of relying on truthiness - Test edge cases - Verify rules handle null/missing attributes
Organizing Your Schema
Section titled “Organizing Your Schema”- Define clear entity types - Separate principals from resources
- Use consistent naming - Follow a naming convention for attributes
- Set primary keys - Every entity should have a primary key defined
- Document with descriptions - Add descriptions to entities and properties
Rule Design
Section titled “Rule Design”- Start with deny-by-default - Only permit what’s explicitly allowed
- Use groups for role-based access - Simplifies rule management
- Keep
unlessconditions focused - Use for specific exceptions only - Review generated Cedar policies - Verify they match your intent
Supported Cedar Features
Section titled “Supported Cedar Features”| Feature | Status | Notes |
|---|---|---|
| Permit/Forbid policies | Supported | Maps to rule effect |
| Principal constraints | Supported | Via subject entity type |
| Resource constraints | Supported | Via resource entity type |
| Action constraints | Supported | Via permissions/actions |
| When clauses | Supported | Expression builder |
| Unless clauses | Supported | Expression builder |
| Attribute access | Supported | Dot notation |
| Set operations | Supported | contains, containsAll, containsAny |
| Comparisons | Supported | All comparison operators |
| Logical operators | Supported | AND, OR, NOT |
| Pattern matching | Supported | like operator |
| Duration functions | Supported | duration, durationSince |
| If-then-else | Supported | Conditional expressions |
| Entity references | Supported | Via entity type properties |
Troubleshooting
Section titled “Troubleshooting”Common Expression Errors
Section titled “Common Expression Errors”“Unexpected token”
- Check for missing operators between expressions
- Verify string literals use double quotes
“Unknown attribute”
- Ensure the attribute exists on the entity
- Check spelling and case sensitivity
“Type mismatch”
- Verify you’re comparing compatible types
- Use appropriate functions for type conversion
Schema Issues
Section titled “Schema Issues”“No primary key defined”
- Add a primary key to the entity before using it in rules
- Primary keys are required for Cedar entity references
“Entity not available as reference”
- Ensure the target entity has a primary key
- Check that the entity type property is correctly configured